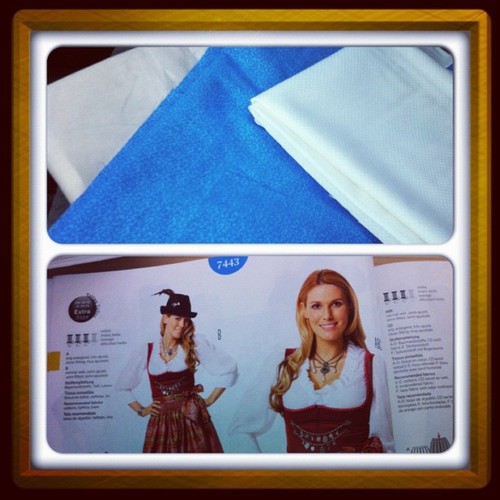
I did decide to make a new apron for my dirndl because I didn't like the length of the white one. My friend needed an apron to wear so it works out perfectly. I didn't end up using the blue plaid silk, I just couldn't bring myself to cut it. I have just enough to make a gorgeous 1860 dress out of it and I think it would be better suited.
But, I did have some fabric left over from the curtains I made. So, in true Sound of Music style, I'm using that for a new apron. It works out perfectly because I think the pink actually looks better with it and the design looks more like traditional dirndl apron fabrics.
I'm going to try to take more picture as I make up the apron.
And here is a photo of the dirndl actually on me! Though I really am still trying to find time to make a more traditional shirt (this is just a random shirt I have) before I go out of town Wednesday. But as you can see the apron is just a bit too short, at least in my opinion.
And on a side note, I feel like whenever I put pictures in Instagram I never can quite fit all of me in them....
Monday, October 1, 2012
Saturday, September 29, 2012
Dirndls
I've always enjoyed anything Austrian, I'm fascinated by their history. I think it started with watching the 1955 movie Sissi . I've been wanting to make a dirndl dress for while now, but I never really had anywhere to wear it too. This year I'm going to an Oktoberfest so I knew I had to make a dirndl. I wanted to make it as accurately as I could but you'd be surprised how hard it is to find a ton of information on making them. I eventually had to do google searches in german to find german blogs. I did find this blog, and that link brings you to all her posts about sewing a dirndl and it was a great help with mine although mine is a little different style.
Dirndls can have some pretty crazy color and pattern combinations that you normally wouldn't put together but for a dirndl it somehow just works. I didn't want to go too crazy with color on my first one, just wanted to test it out so I ended up with a tan bodice ( the leib), a blue fabric with small pattern skirt ( the kittel), and a white fabric with small polka dots for the apron. Although I found a beautiful blue plaid silk I have that I'm thinking of making another apron out of, the white is very boring.
This pattern was Burda 7443 and I really liked it a lot. It takes a while to cut out of the pieces but it's pretty easy and goes together quickly. I really like the lines of bodice and how it fits. I'd like to make more that could work for everyday wear, so the ones that have a higher bodice. It's easy to line and the fit is flattering. I also just discovered I had a blind hem stitch foot for my machine and I got to do a blind hem on this! I can't believe I've never done a blind hem before! I usually hate hemming but this was easy and it looks great.
The apron was the last thing I did. While I really like the design of the apron, I'm not in love with mine. I didn't measure well and I wish it was a bit longer and I don't think the white looks as good as I thought it would. I actually also had trouble finding pleating tape so I ended up using this blue checked fabric I had on hand, which did work pretty well.
I'll post the finished picture of it after next weekend!
Doing all this research on dirndls has really inspired me. I love the fit and lines and would love to incorporate it into a jacket like the ones Lena Hoschek designs-
But there's so many design options in dirndls and that's what I love about them. You can put piping in the seams which looks great, but there are also lots of trims you can make to put on them. I might still make some of this with blue fabric and add it to the top
This picture came from here where she also shows you how to make this trim which is called Froschmaulrüsche. This blog is all in german but it shows some great pictures of dirndls in construction.
Another designer that I love is Susanne Spatt. Her dirndls and other clothing are gorgeous!
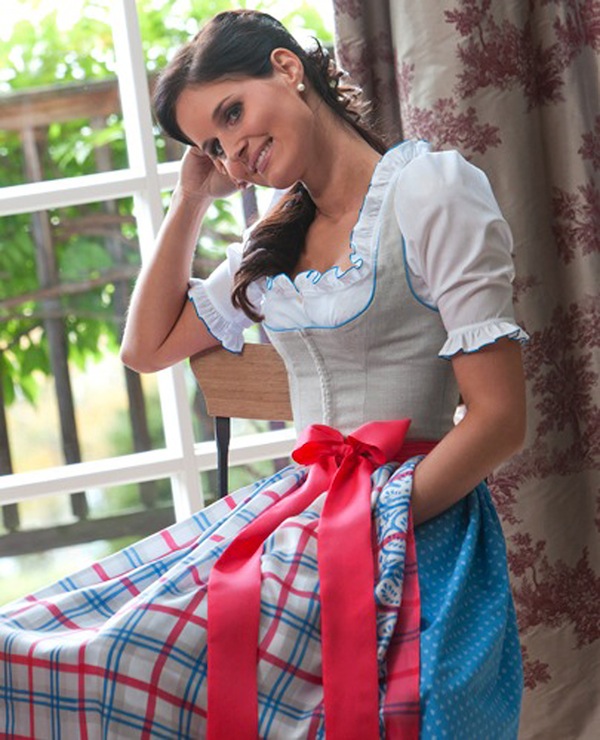
This dress here is what inspired me for my dirndl color combination! But going through her collections, they are all so beautiful and inspiring.
Sunday, August 5, 2012
Traveling Bag
I've been searching for the perfect vintage suitcase for a while and earlier this summer I found one in a vintage store for a great price and I'm about to put it to it's first use this Thursday!
2. Next I made a pattern piece, just a rectangle of 25" width and you will double the length since this is going to fold over the pocket so my width was 13" and then I added 1/2" seam allowance to all sides. You will need a second rectangle for the pocket and that will be your basic measurement 25" and 6 1/2" and add your 1/2" seam allowance except for the top length of this rectangle add 1" seam allowance so that you can fold it over twice and make a nice edge (I hope that makes sense!). Im sorry for the picture on this step, I have a ton of newspaper and wanted to use some of that up but it makes it harder to see the pattern and on top of that I made the bottom piece and pocket on the same pattern piece which adds a little more confusion but hopefully it's still easy to get?
It's a perfect size for a weekend trip and there's a pocket along the top. Since it is kind of hard to clean the inside of a suitcase and I don't want to just stick things in that pocket, I'm making a simple fold over travel bag to put smaller items into like underwear and whatnot.
So here's how I did it!
Fold Over Traveling Bag
1. First if there's a specific place you want to put it such as this pocket measure the length and width. Or you could simply make a large square. Mine is about 25 " width and 6 1/2 " length.
2. Next I made a pattern piece, just a rectangle of 25" width and you will double the length since this is going to fold over the pocket so my width was 13" and then I added 1/2" seam allowance to all sides. You will need a second rectangle for the pocket and that will be your basic measurement 25" and 6 1/2" and add your 1/2" seam allowance except for the top length of this rectangle add 1" seam allowance so that you can fold it over twice and make a nice edge (I hope that makes sense!). Im sorry for the picture on this step, I have a ton of newspaper and wanted to use some of that up but it makes it harder to see the pattern and on top of that I made the bottom piece and pocket on the same pattern piece which adds a little more confusion but hopefully it's still easy to get?
3. Now you'll want to cut your pattern pieces. You should have two back pieces and one pocket piece. To cut the pocket piece I just folded the newspaper down to the top of the pocket line.
4. Take your pocket piece and turn the top edge hem over. I ironed it first and then sewed it. At this point if you wanted to embroider something on this piece you would.
Then you sew it to one of the back pieces. If you want to add pockets within the pocket you would do it now too. Just a straight line up wherever you want the dividing line to be. Sewing the pocket on you will want to sew less than the 1/2" allowance so that you wont see this later.
5. I didn't have any interfacing that was stiff enough but if you want to put some in you would iron it or sew it to the bottom half of this back piece with the pocket on it now.
6. Next I'm adding a design that will show up on the front. This could be skipped if you want it plain though.
7. Now with the inside pockets facing the pretty side of outside back piece sew all the way around 1/2" seam leaving open a small space at the very top to pull the piece through.
8. Close the opening hole and place a pretty bow on it to hide the stitches! Or put a decorative stitch all around or a ribbon border!
This has so many options to customize and could be made into so many different shapes and sizes. I used this pink cotton I needed to use up, but it would be so pretty in a satin with lace on the front or embroidery! Adding ribbon ties on one would be pretty too or a button to keep it close. With this long shape I can leave it how it is or fold it up along the pocket lines.
After completing this I really do recommend using some kind of interfacing on the inside to give it more stiffness especially if you do a long shape like this one.
I'm really happy with this fold over bag and I'll have to find more reasons to use it than just when I'm traveling!
Labels:
embroidery,
Fold Over Bag,
suitcase,
Tutorial,
vintage
Saturday, August 4, 2012
Curtains
I move into my apartment next weekend and I've been busily trying to finish getting everything I need. First I need a curtain for my closet because while there's a doorframe there isn't actually a door. I found this adorable pink linen fabric with little embroidered bows on it. I plan on using one of those curtain rods that just kinda fits into the doorway so making the curtain was really simple. I just turned it over, left some room at the top for a little ruffle, and stitched two lines to make a pocket for the rod to go through.
Here it is hanging by a rod over my current
closet and theres a door in the way so it's hanging at an angle, but it gives the idea of how it looks! The only thing left to do is cut and hem it. I'll have a good amount of fabric left over and I'm thinking of making some cute matching pillows!
My second curtain is for the window of my bedroom. For whatever reason I never realized how small it was width wise. I knew the measurements but it just didn't sink it until I put in outline of the window on the carpet to figure out how I wanted to do the curtains. I think it may be too small to do two panels which was my original plan.
Here it is hanging by a rod over my current
closet and theres a door in the way so it's hanging at an angle, but it gives the idea of how it looks! The only thing left to do is cut and hem it. I'll have a good amount of fabric left over and I'm thinking of making some cute matching pillows!
My second curtain is for the window of my bedroom. For whatever reason I never realized how small it was width wise. I knew the measurements but it just didn't sink it until I put in outline of the window on the carpet to figure out how I wanted to do the curtains. I think it may be too small to do two panels which was my original plan.
The second picture is an idea I got from this picture on Better Homes and Garden-
I love this design, it's so cute! But i'm not sure if I could make it to where it could be lowered and while there are blinds already on the window, I'd still like to be able to shut my curtains. I really don't have much time left so I'll probably just make two panels and if it's too much on the window I'll just use the one.
My room "theme"/"colors" are blue and pink because that's what my bedspread colors are, so I'm trying to incorporate some blue into the curtains most likely through some bows!
Besides working on these curtains, I did finish a blue satin dress for a wedding coming up (but more so to match my new Seychelle shoes!), I found a great vintage bedspread and pillow cases for my apartment, and I've got some other sewing projects going on that I will be posting soon!
Friday, July 13, 2012
Fourth of July!
I actually finished this dress a week or two before... and I just finally got around to posting it.
On the actual fourth though it was too hot to wear a sundress. I used an old bed sheet but it turned out heavier than I thought it would.
I used the Horrockses Fashion I mentioned in the last post. It actually wasn't the easiest pattern... maybe I made it harder for myself somehow but I couldn't figure out the sizing so I had to guess and cut one out and make a quick mock up of the top before I used my white fabric.
Once I had it figured out though it went together really quickly and it's a great sundress pattern. I'd like to try to make it as a strapless dress too. With just some boning I think it would work great.
On the actual fourth though it was too hot to wear a sundress. I used an old bed sheet but it turned out heavier than I thought it would.
I had a pair of shorts and based off of pictures I saw online I painted them using fabric paint. I love how they came out and I wore it with a blue gingham button up shirt. One thing I didn't like is that the shorts are really stiff from the paint. I guess I thought since it was fabric paint it would blend into the fabric well. I would love to do this again but do the Texas flag instead!
Saturday, May 26, 2012
A Sundress
Last year for the Fourth of July I made a sun dress that had little flags all over it. I was thinking about wearing it for Memorial Day too but the dress is a little too small and I don't love it as much as I did last year. While I was on etsy I found this child's dress pattern, Simplicity 3981.
The description says Simplicity Pattern No. 3981- Girls -Simple to Make- one piece dress and jacket. Dress has shoulder straps, back zipper, corded piping at waistline, and full gathered skirt. Jacket has back button closing, notch detail on front and is faced or lined. Short sleeves or sleeveless, with or without contrast collar.
I love the simple white sundress with a blue ribbon and a red ribbon border. It's not too over the top. You could wear it whenever but at the same time it's great for the Fourth of July or Memorial Day.
Obviously it's too small, so I figured I would keep an eye out for a simple sundress with a plain straight bodice like this one. Fortunately I happened upon a free pattern today for just the sundress I was looking for!
Horrockses Fashion is a british brand established in 1946 selling bed linens. The Linens are adapted from many of their original dress designs from the 40's and 50's. They don't have any dresses yet but on their website they offer a free pattern for a sundress!
It's just the type of bodice I wanted to find for this dress and who doesn't love a free pattern!
I think I have enough white fabric for this dress. All I would need is the red and blue ribbons and it seems like it should be a very quick and easy sew.
Of course I'll have to find the time for it still! Lately I've been trying to finish up the numerous other sewing projects laying about. Plus a lot of little sewing things like hemming some dresses and some pants and sewing on new buttons for a dress. I did spend the day thoroughly cleaning and organizing my sewing room the other day though! I love sewing when I've just got the room cleaned up and organized!
Wednesday, May 16, 2012
18th Century
Lately I've been really interested in the 18th century and while I'm still doing research I definitely would like to start sewing some things. Of course I'd have to start with the basics since I have no 18th century underthings.
American Duchess is having a giveaway right now for a pair of Pompadour Court Shoes or Kensington Colonial shoes. I've been wanting a pair of her shoes for a while now! They are all so beautiful!
I would definitely love to get a pair of the Kensington shoes to start my 18th century sewing off. What a great giveaway!
American Duchess is having a giveaway right now for a pair of Pompadour Court Shoes or Kensington Colonial shoes. I've been wanting a pair of her shoes for a while now! They are all so beautiful!
I would definitely love to get a pair of the Kensington shoes to start my 18th century sewing off. What a great giveaway!
Subscribe to:
Posts (Atom)